
Microsoft Teams allows meeting organizers to create breakout rooms during meetings. Breakout rooms are separate, virtual rooms that meeting attendees can be added to. Breakout rooms are excellent to utilize when separate group discussions need to take place. Teachers often separate their classes into smaller groups during in-person learning, and using Microsoft Teams’ Breakout rooms feature, this can also be done during virtual learning.
Please note that meeting organizers can create breakout rooms using the desktop version of Microsoft Teams (Windows and Mac) only.
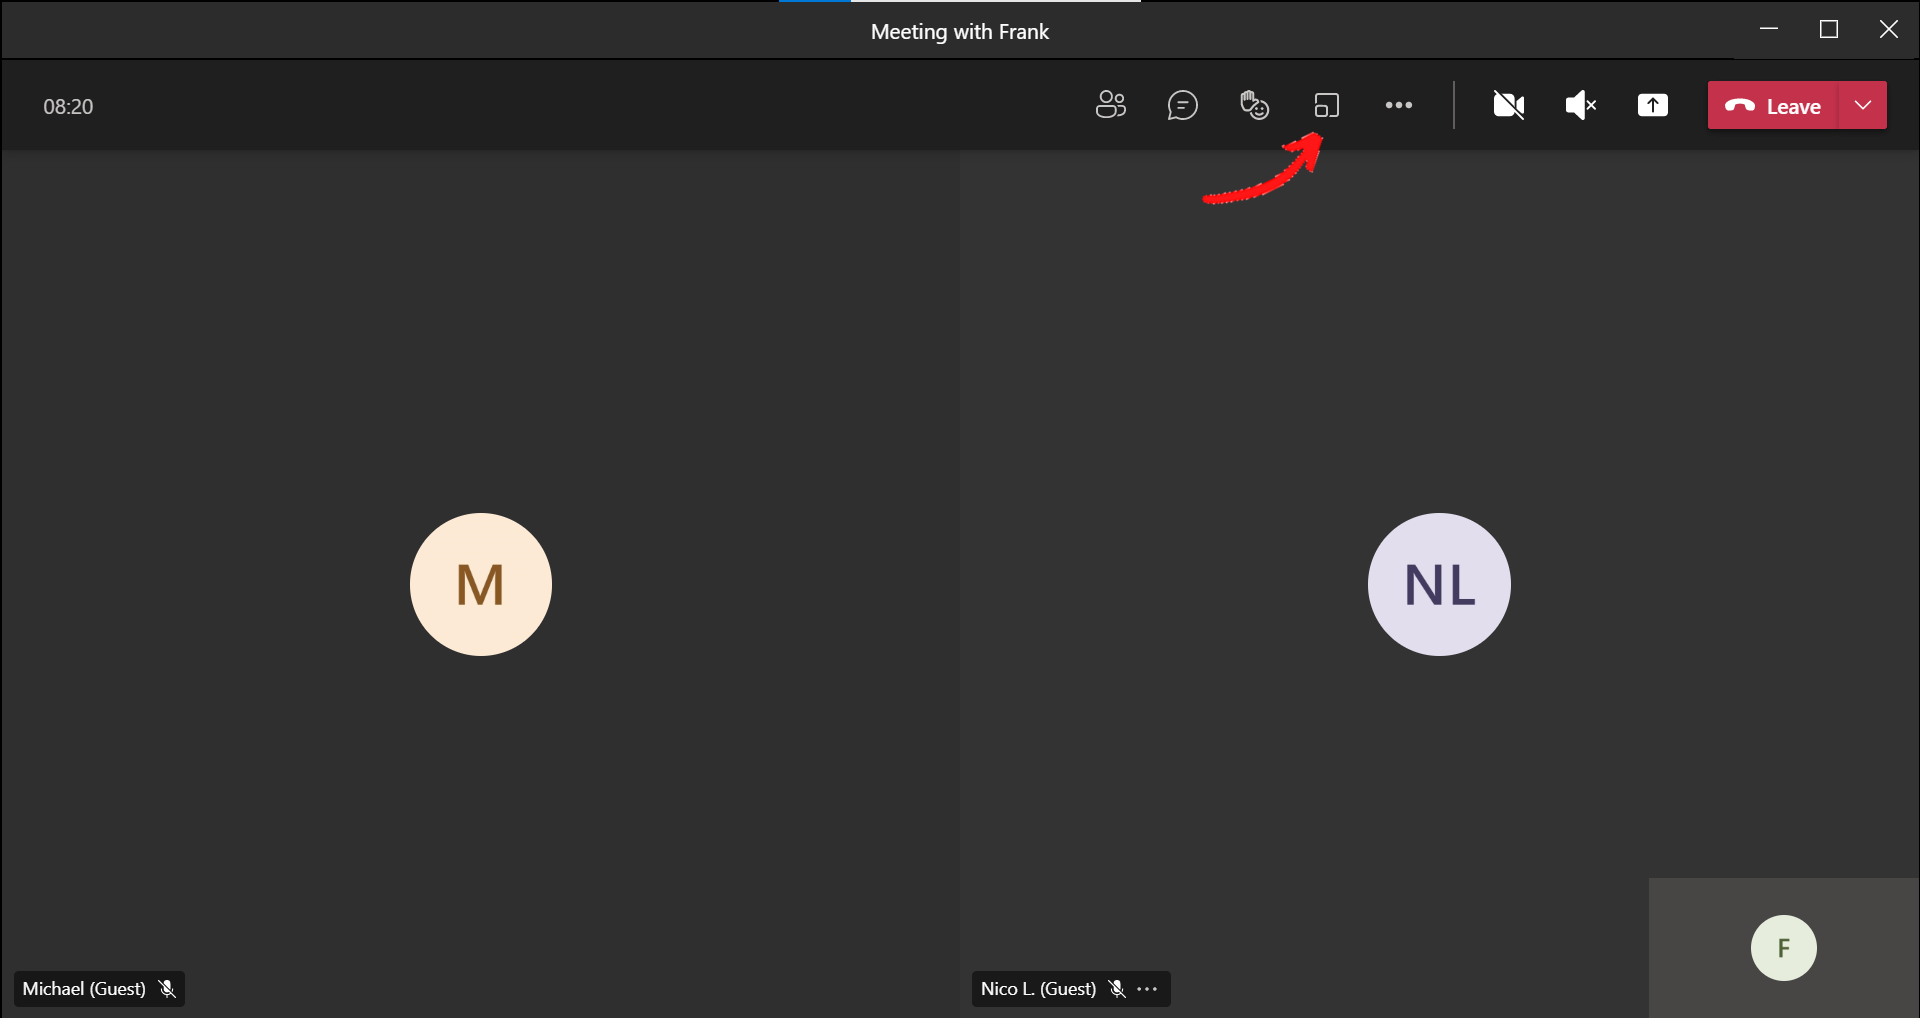
How to create breakout rooms
1. During a meeting, select the Breakout rooms icon.
2. In the new window that appears, choose how many breakout rooms you would like to create and how you would like to assign the meeting participants into them — either Automatically or Manually.
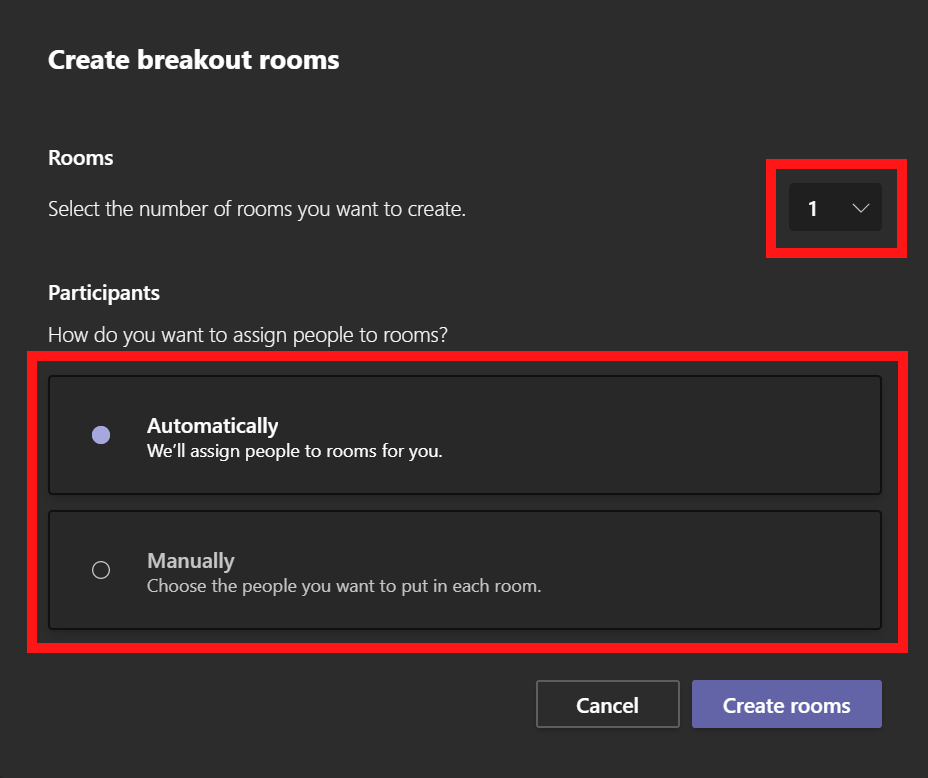
3. Select Create rooms.

Assigning participants to breakout rooms
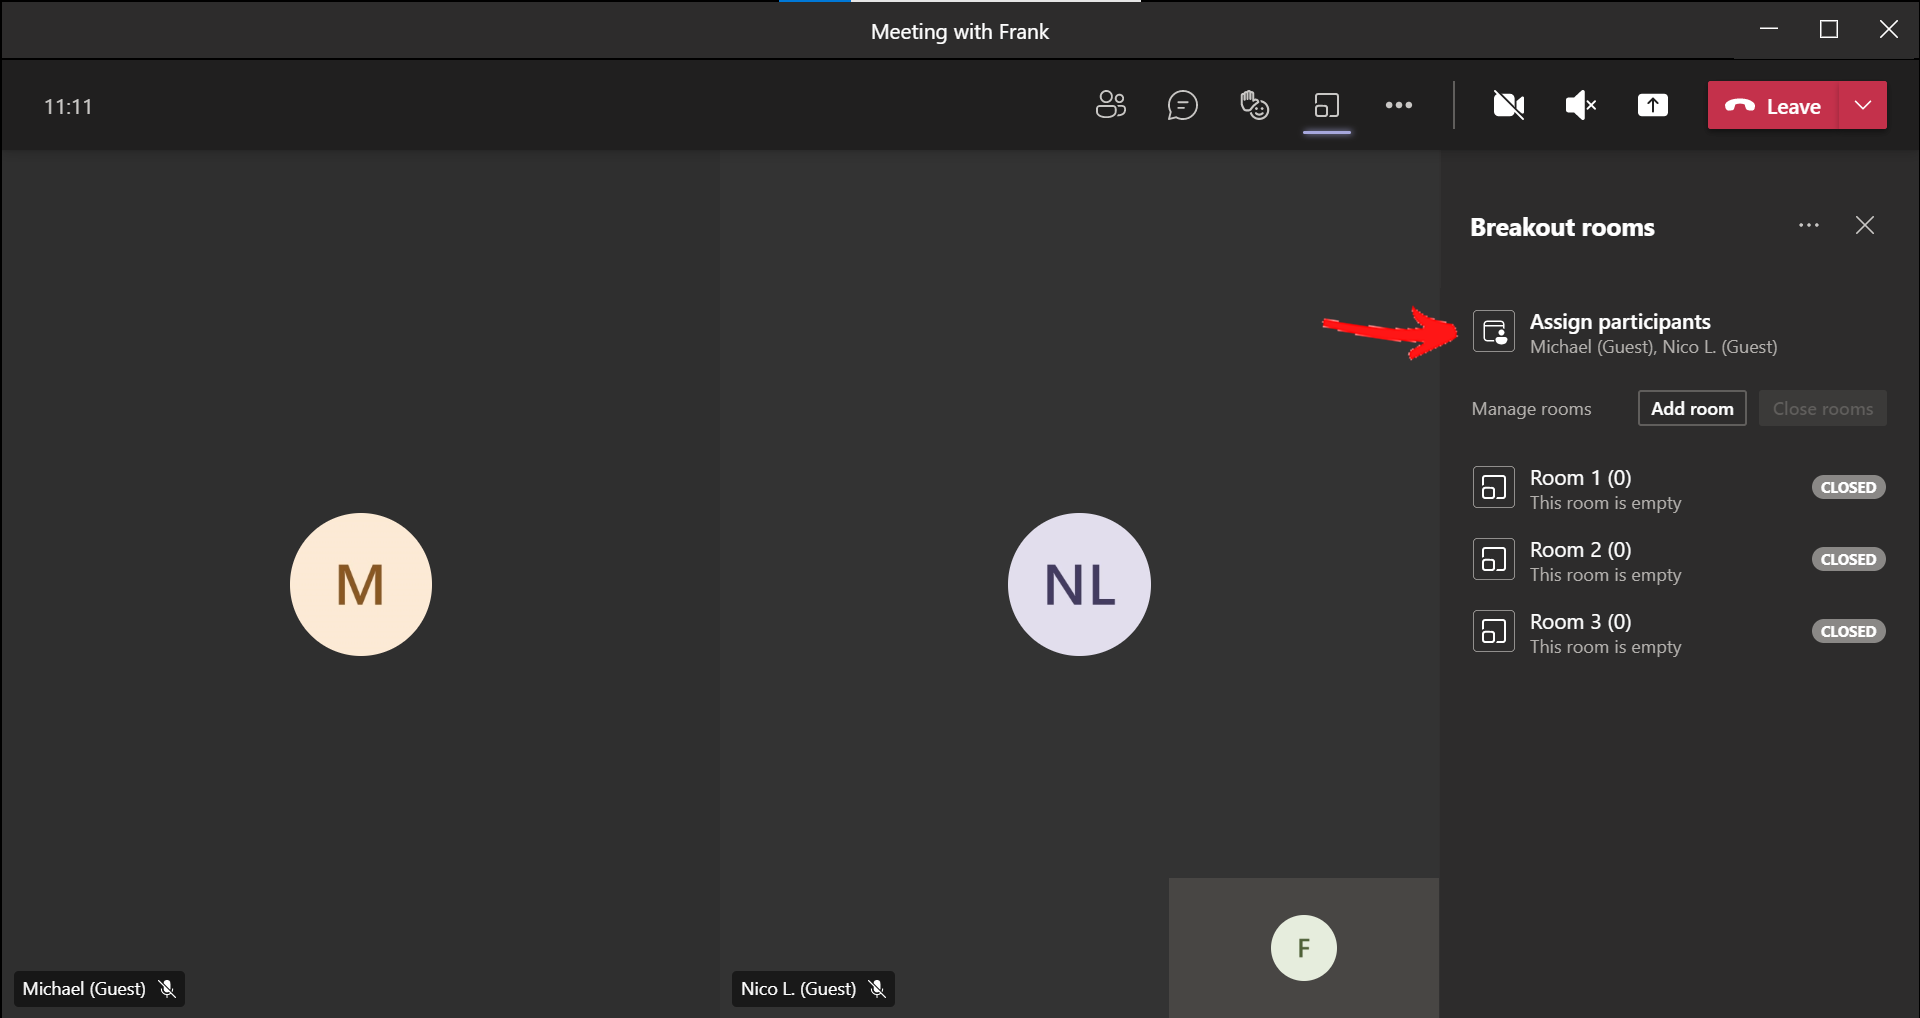
If you choose Automatically, everyone will be assigned to a breakout room immediately after you create them. However, if you choose Manually, here is how to assign participants to breakout rooms:
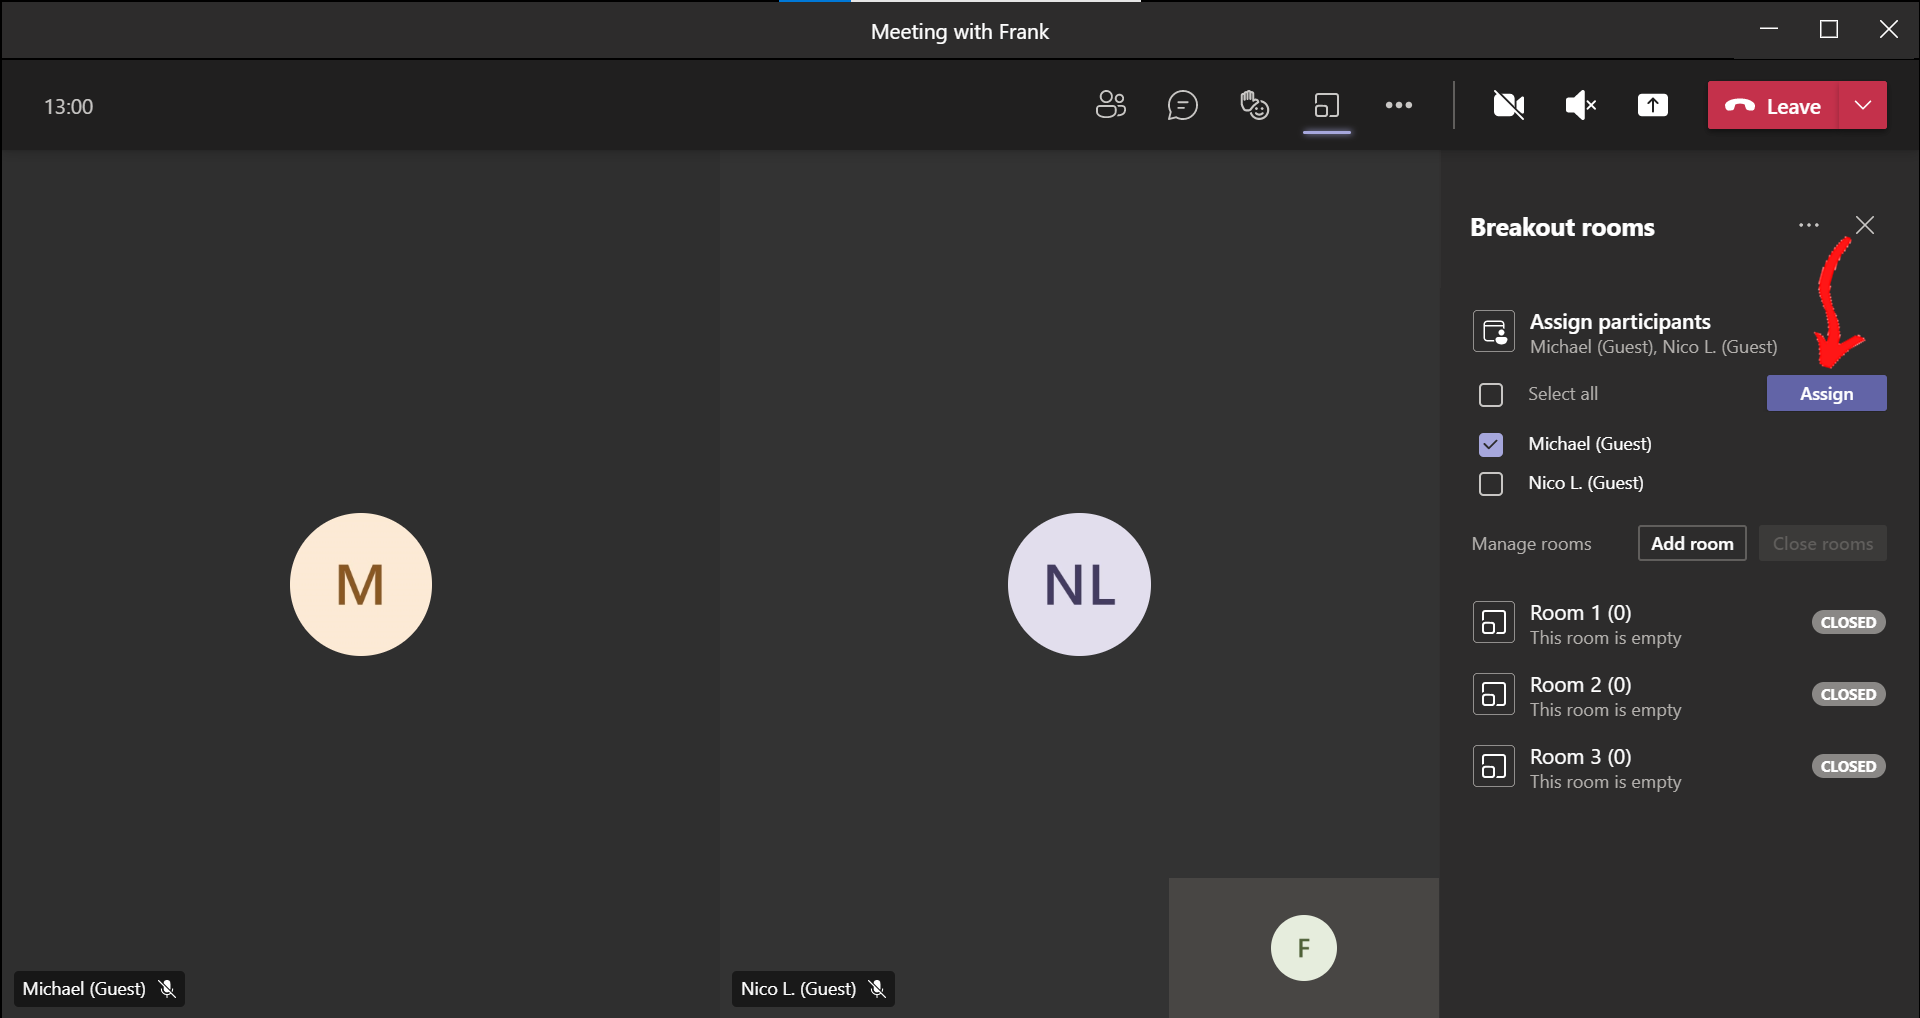
1. After selecting Manually > Create rooms, a new panel will open on the right-hand side of Microsoft Teams. Select Assign participants.
2. Select the checkbox next to the participant(s) who you want to assign to a breakout room.
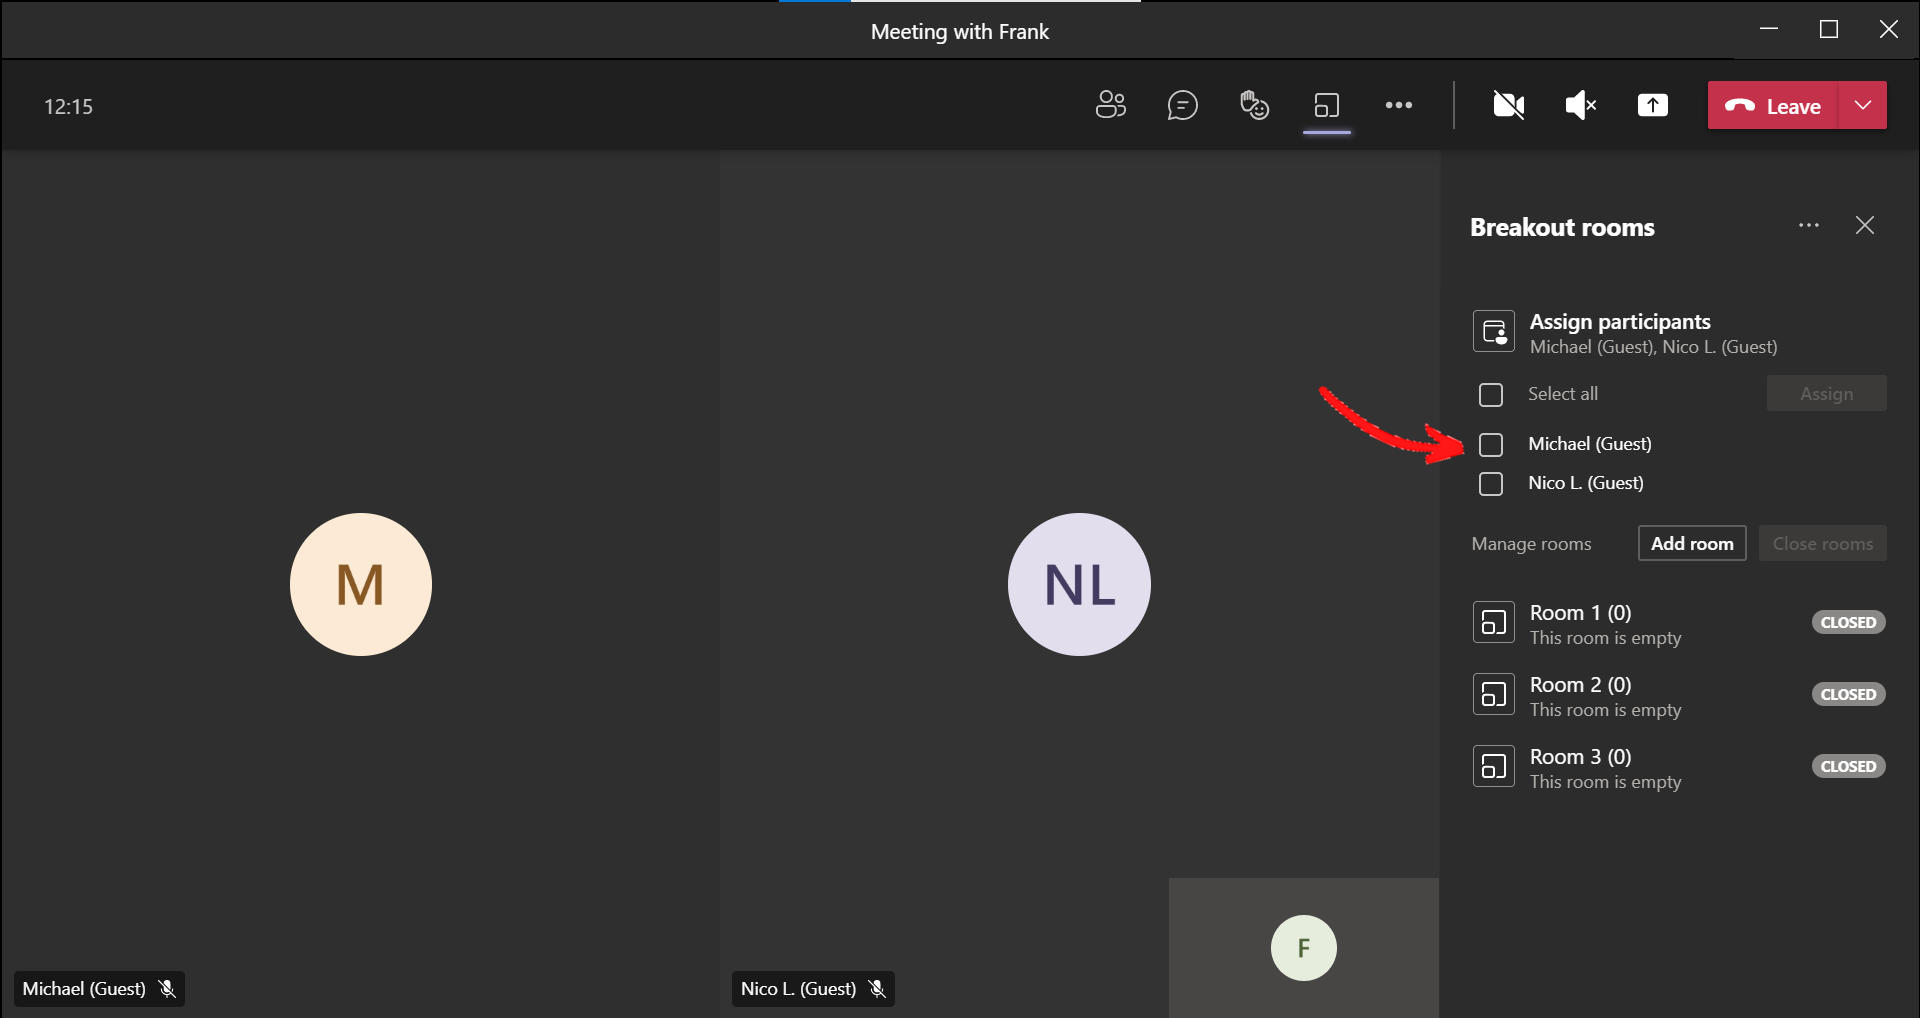
3. Click Assign.
4. Choose which breakout room to assign the selected participant(s).
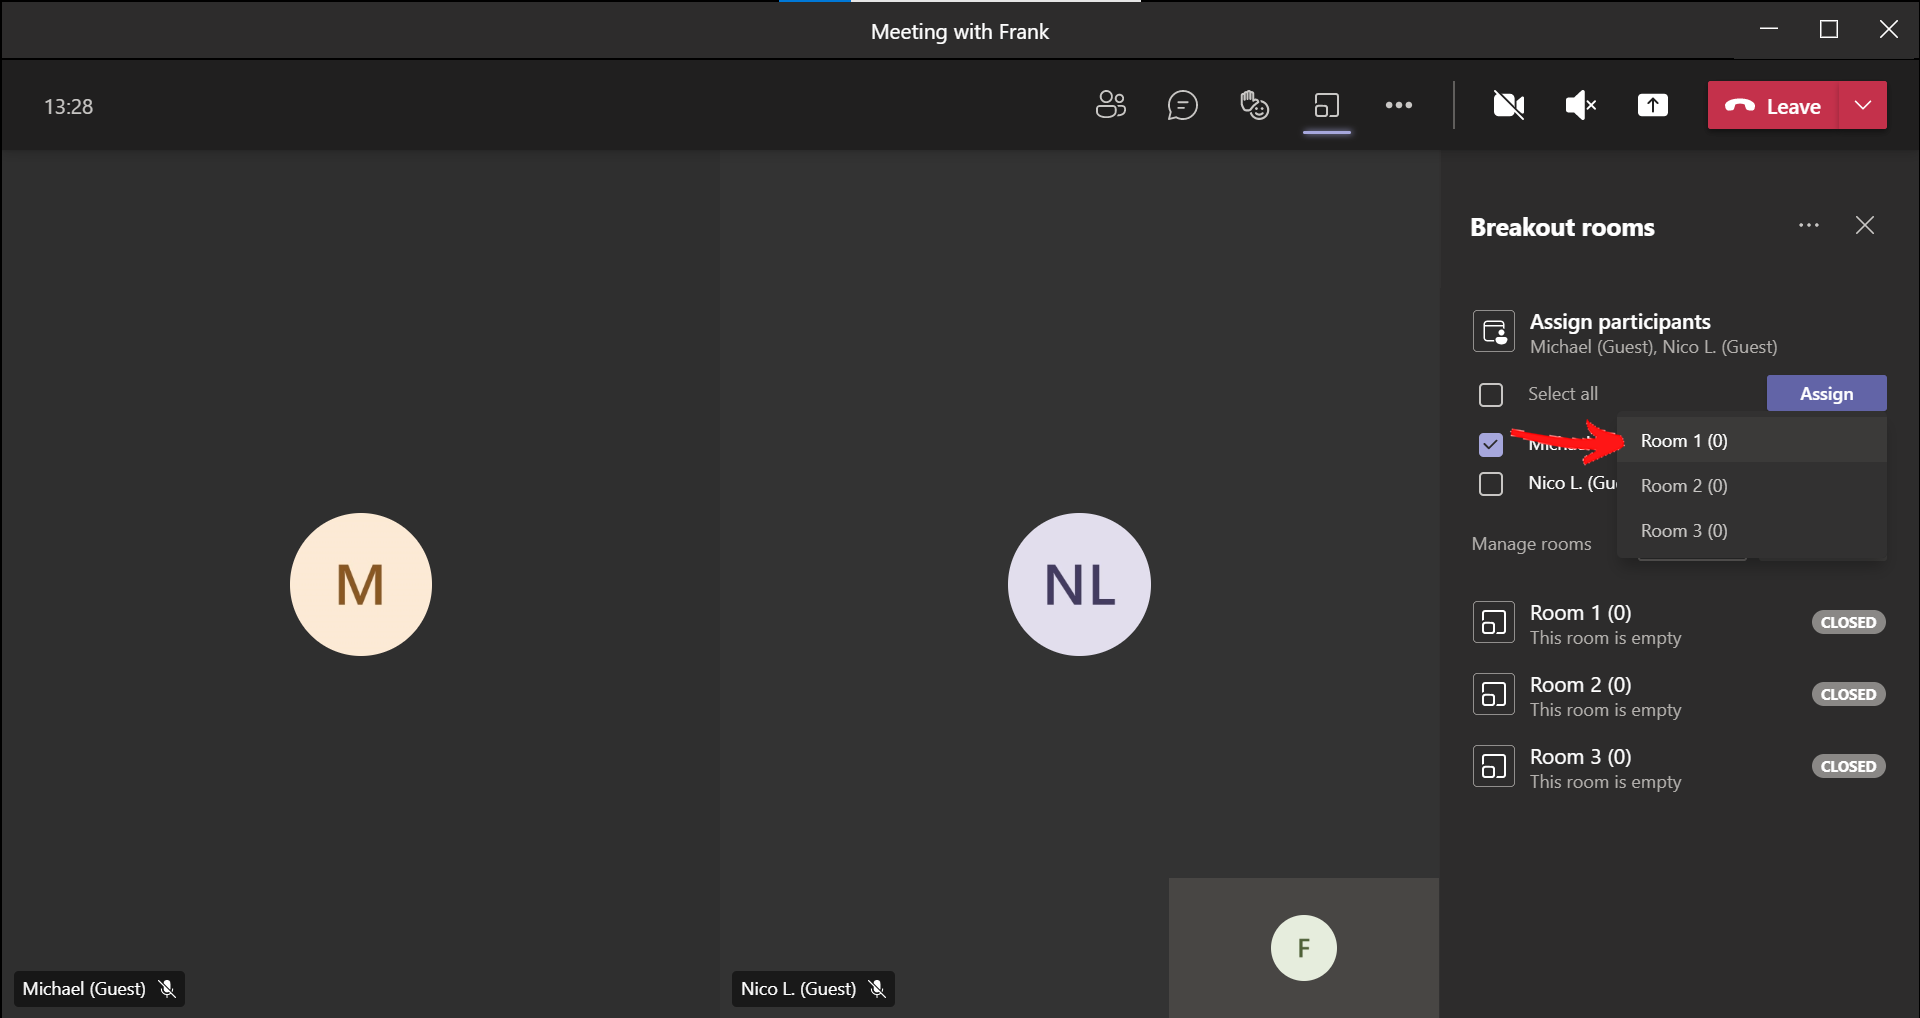
5. Repeat steps 2 to 4 until every meeting participant that you wish to add to a breakout room has been added.
Having trouble with any of the steps mentioned above? Submit a support request here.
Want to learn more about what can be done using Microsoft Teams’ Breakout rooms feature? Click here.
Comments
0 comments
Article is closed for comments.