
OKIOCAM is the first USB camera specially designed for education users, and OKIOCAM Time-Lapse is one of the primary applications in the OKIOCAM’s product package. This guide will walk you through the installation process for OKIOCAM Time-Lapse.
Step 1: Visit the OKIOLABS download page. https://www.okiolabs.com/download/
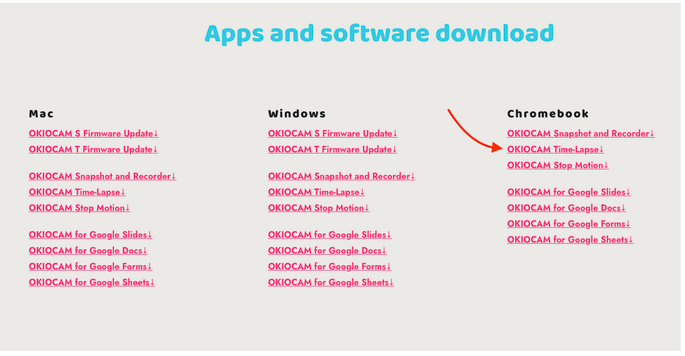
Scroll down to the “apps and software download” section and click on OKIOCAM Time-Lapse in the “Chromebook'' column. A new tab will open, taking you to the Chrome Web Store.
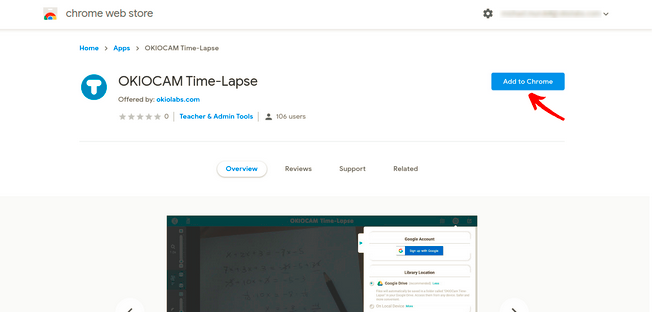
Step 2: In the newly opened tab, click Add to Chrome.
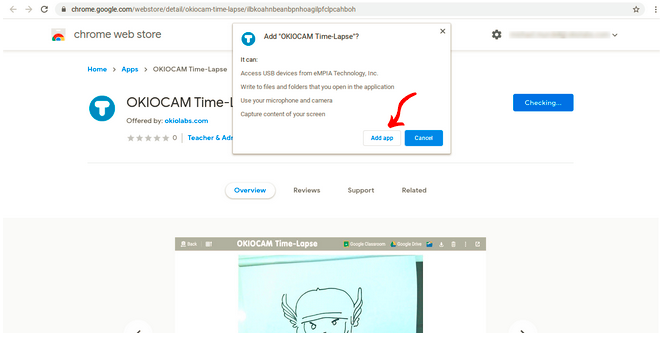
Step 3: A dialog box will appear, informing you of how OKIOCAM Time-Lapse can interact with your Chromebook. Click Add app. The app will then begin downloading.
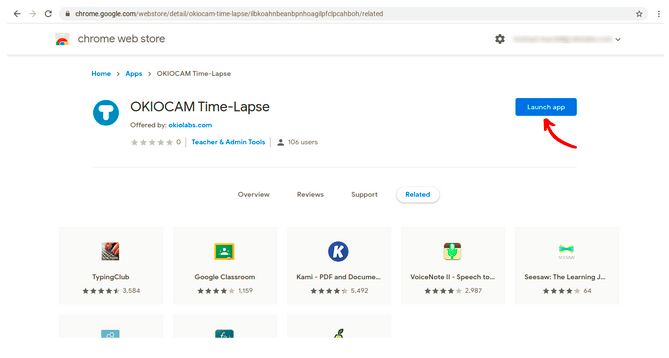
Step 4: Once the download has completed, click Launch app.
Step 5: OKIOCAM Time-Lapse will open. Click Sign up with Google.
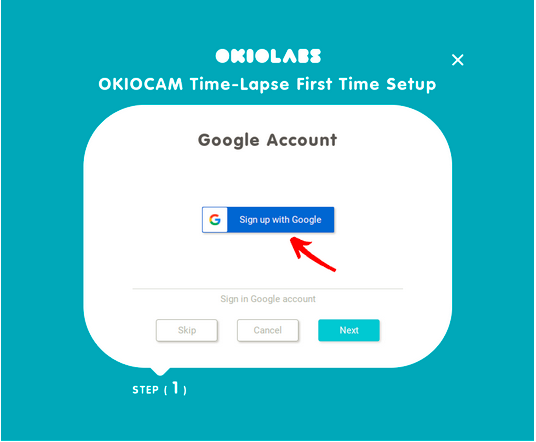
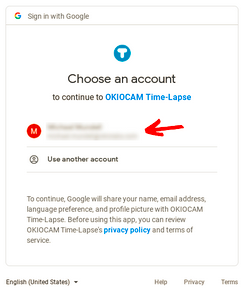
Step 6: Choose the Google account that you wish to use.
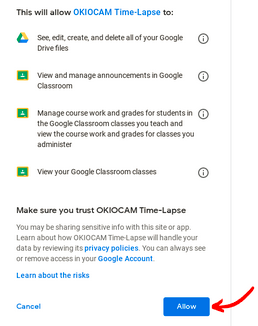
Step 7: Confirm that you grant OKIOCAM Time-Lapse access to your Google Drive and Google Classroom by clicking Allow.
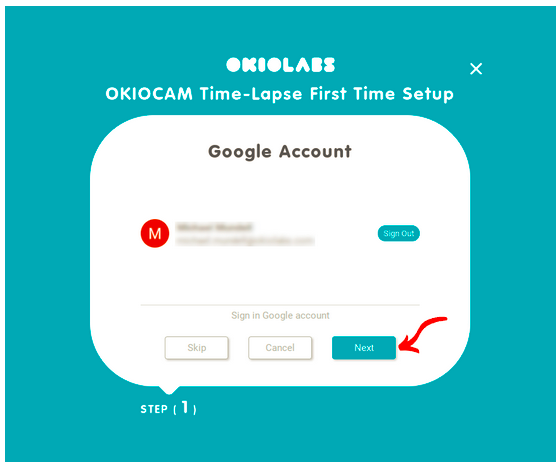
Step 8: Click Next.
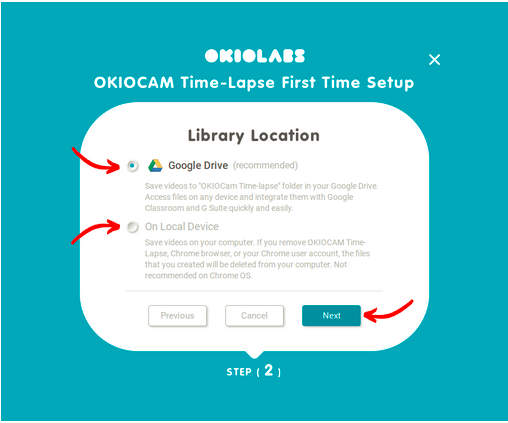
Step 9: Choose the location that you want to save your videos to. Select Google Drive to save them to your Google Drive. Select On Local Device to save them locally on your Chromebook. It is recommended that you choose Google Drive. Once you have chosen, click Next.
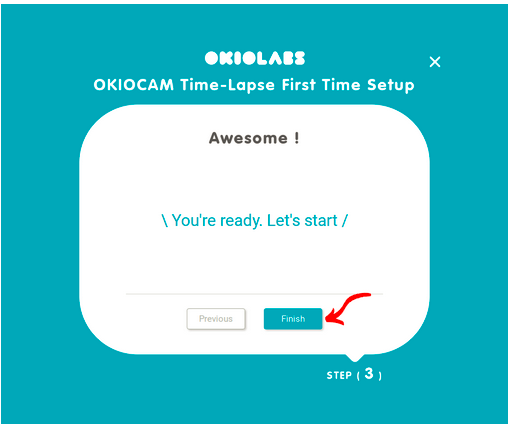
Step 10: Click Finish. OKIOCAM Time-Lapse is now installed.
Comments
0 comments
Article is closed for comments.