
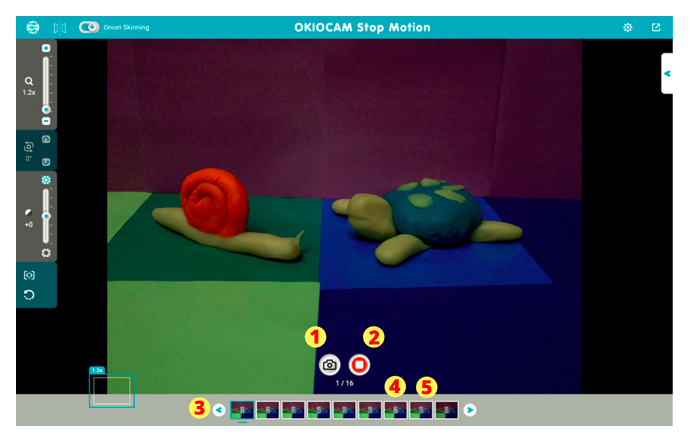
Live View
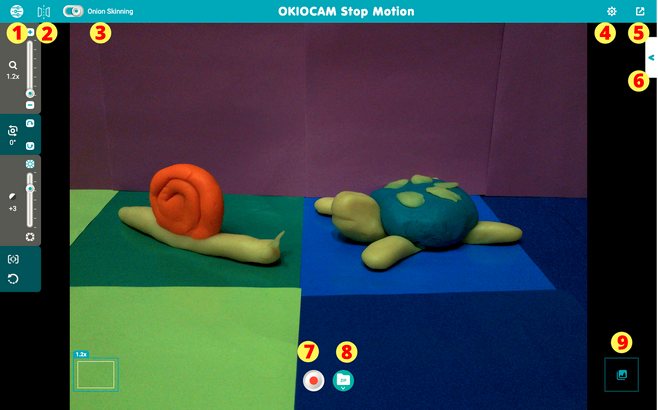
- Press
 to show the Menu. Press again to hide.
 - Press
 to Mirror the image on the screen. It allows you to reverse the image horizontally.
 - Toggle Onion Skinning on (
 ) and off (
 ). Turn Onion Skinning on when you want to see a translucent version of previously recorded images. It can be helpful when deciding where to position objects or drawings when creating stop motion videos.
 - Press
 to access the Settings menu.
 - Press
 to toggle in and out of Fullscreen. You can also press Esc to exit Fullscreen.
 - Press
 to access the Settings menu.
 - Press
 to start recording a stop motion video. Press to take a snapshot. Press to stop the recording.
 - Press
 to Import Project File. You can upload a previously saved or unfinished (.zip) project to continue working on it.
 - Press
 to enter Review Mode.
Menu
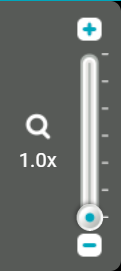
Use the Zoom control to adjust the level of zoom. Press the ![]() and
and ![]() icons to adjust the zoom in increments of 0.1x, between 1x and 6x. Zoom can also be adjusted using the slider by left-clicking on
icons to adjust the zoom in increments of 0.1x, between 1x and 6x. Zoom can also be adjusted using the slider by left-clicking on ![]() and dragging the mouse up or down.
and dragging the mouse up or down.
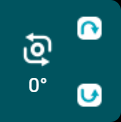
Use the Rotate control to rotate the camera display clockwise and ![]() counterclockwise in increments of 90°.
counterclockwise in increments of 90°. ![]() rotates the camera display clockwise and rotates counterclockwise.
rotates the camera display clockwise and rotates counterclockwise.
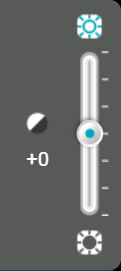
Use the Exposure control to adjust the level of exposure. Press the ![]() and
and ![]() icons to adjust the exposure in increments of 1, between -7 and +7. Exposure can also be adjusted using the slider by left-clicking on
icons to adjust the exposure in increments of 1, between -7 and +7. Exposure can also be adjusted using the slider by left-clicking on ![]() and dragging the mouse up or down.
and dragging the mouse up or down.

Press the Focus / Auto adjust button to adjust the camera’s focus, exposure, and white balance automatically.

Press the Reset button to reset the camera.
Settings
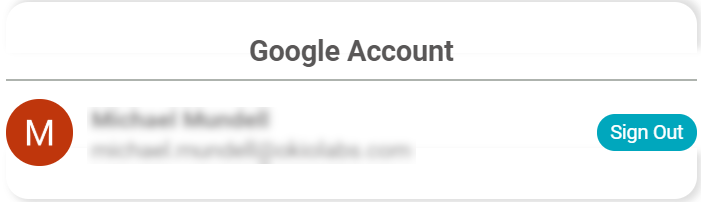
Press Sign Out to sign out of the Google account that is currently signed in.
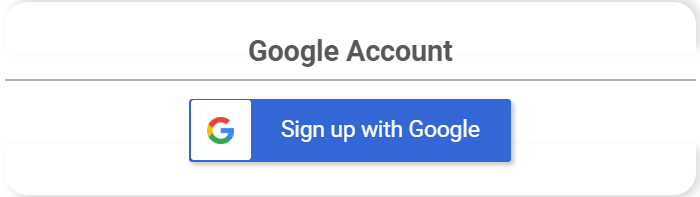
If you are not currently signed in to a Google account, press Sign up with Google to sign in to one.
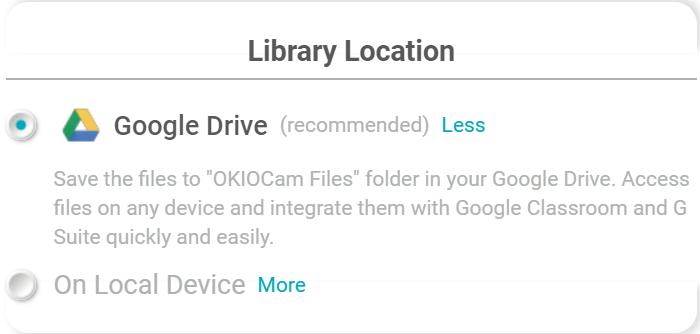
Change the storage location of your stop motion videos. Select Google Drive to save them to your Google Drive. Select On Local Device to save them locally.
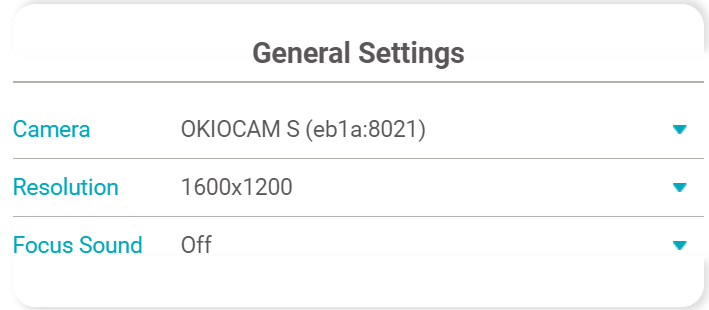

- From the Camera drop-down menu, you can choose which camera you want to use with OKIOCAM Stop Motion.
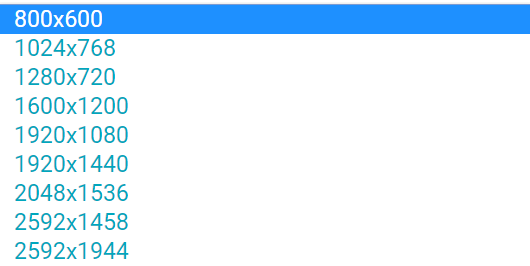
- Use the Resolution drop-down menu to select which resolution you would like to view the Live View and record your stop motion videos in. Available resolutions will depend on which camera you are using.
- Use the Focus Sound drop-down menu to choose if you want to hear a beeping sound after the camera focuses or not.
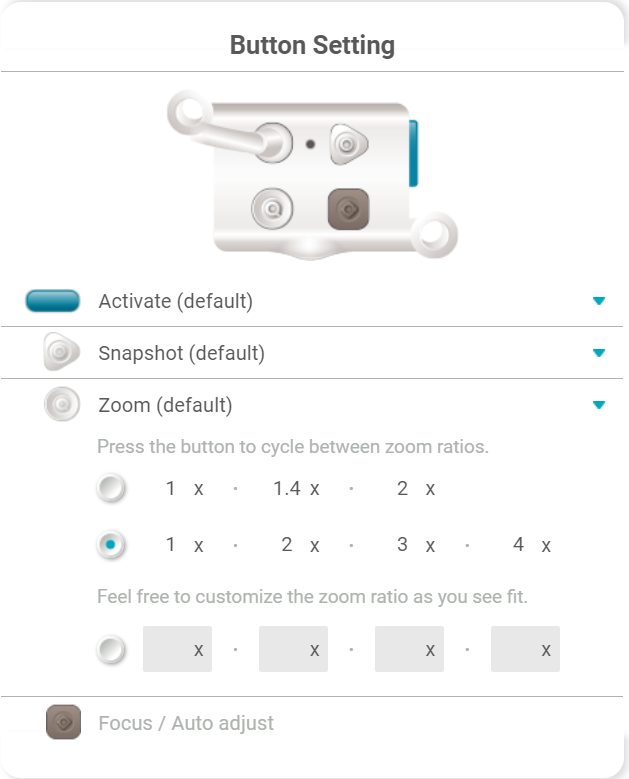
- Use the drop-down menus to reassign different functions to the physical buttons on the camera.
- Choose the zoom ratios that will be cycled through when the button assigned to zoom functionality is pressed. Input custom zoom ratios if you wish.
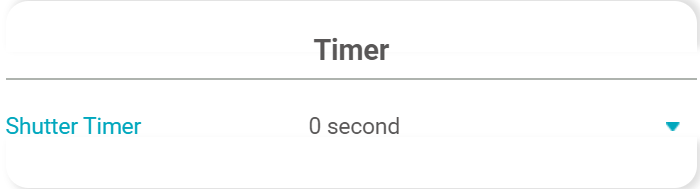
- Assign a shutter timer time of either 0, 2, or 5 seconds using the Shutter Timer dropdown menu.
Creating Stop Motion Videos (1 of 3)
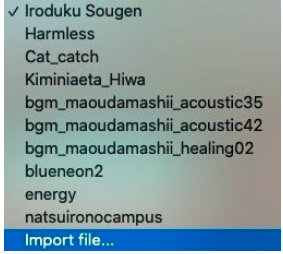
- Check the
 box to add BGM (background music) to the stop motion video. Uncheck the box to choose no audio.
 - Click the drop-down menu (
 ) to either choose from a selection of royalty-free music to add to the stop motion video.
You also can upload your own locally stored audio file by clicking Import file. Supported file formats: MP3, WAV, OGG, and FLAC.
3. Use the music preview tool (![]() ) to listen to the selected audio track.
) to listen to the selected audio track.
4. Press the ![]() button to merge the chosen audio file with the stop motion video. If you wish to remove the chosen audio file, press the
button to merge the chosen audio file with the stop motion video. If you wish to remove the chosen audio file, press the ![]() button that appears.
button that appears.
5. Click on the blue text that reads ‘Save current version’ to save any stop motion project to
your local hard drive. There are 3 options:
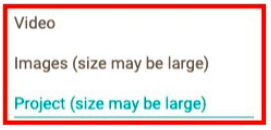
Video - Will save the project as a finished video (can not be re-uploaded to the app).
Images (size may be large) - Will save the project as individual images (can not be re-uploaded to the app).
Project (size may be large) - Will save the project as a (.zip) file which can be re-uploaded to the app for modification or continuation at a later time.
6. Press the ![]() button to discard all snapshots.
button to discard all snapshots.
7. Press the ![]() button to finish creating the stop motion video.
button to finish creating the stop motion video.
Note: Once you have pressed ![]() , you will no longer be able to edit or return to the project. If you wish to save the project to further edit or continue working on it at a later time, please see the next Section.
, you will no longer be able to edit or return to the project. If you wish to save the project to further edit or continue working on it at a later time, please see the next Section.
Comments
0 comments
Article is closed for comments.